Koko Crater Arch Trail Photos


You might also consider


More like Koko Crater Arch Trail
Recommended Reviews - Koko Crater Arch Trail
Start your review...


Reviews With Photos


Short hike. But the end, very steep and scary to go down. Beautiful view. But I had enough for 1 time.


This route is great if you have some extra time. It's quite a bit longer than the railway trail, but it is definitely much more fun. Our tip is to bring two or more cars. Have one parked by Sandy's and the other parked at Koko Head State. You may choose whether you want to go up the rim and down the stairs or up the stairs and down the rim. You could go up and down the rim, but what fun is that? Scenery is pretty epic. There are definitely some more narrow/steeper parts. Branches stick out into the path as well so you need to watch out for you legs. If you go in the mid afternoon or early morning, you don't need to worry about the sun killing you. Time of completion? Depends on the route you take. If you start with the stairs it may take longer as you're more cautious going down the ridge. Possibly around 2.5-3 hours including the walk to your car. Starting with the ridge and ending with the stairs could run you around 2.5 hours including the walk from the car. Bring your friends and have a good time! Not recommended for pets though. They would probably make it through, but taking care of your dog while hiking up and/or down this ridge is a bit more than you could ask for.


One the most underrated hikes on the island that's more sure! Make sure you bring plenty of water and sunscreen as it is nearly non stop sunlight beaming on you the whole time, I would not recommend this hike with cloudy weather as you wont be able to see the gorgeous views of the ocean and mountain ranges of course! Also Koko head as you walk up looks great too. There is some bees on this trail and other bugs so be weary of that and try to avoid them to the best of your ability.


This is NOT the way with train track/stairs. That's the OTHER side. Today, not only did I almost fall off a mountain but also saw whales in the distance (at sea) and had two stray bullets fly over my head. Also, despite the vog keeping me at bay from taking clear photos, I'd say today was a great hike. In fact, superb! The Koko Crater rim trail is located inside the Koko Head Botanical Garden and stables behind the Hawaii Kai Golf Course. As you walk through the garden, stick to the trail on the left. It's about a 5-10 minute trek to the trail head. You'll know you're there when you reach the "Dry Palms" area. Look for the "Madagascar" section and the "DANGER: No access. Dangerous Conditions" sign shrouded under trees. There you will see the path up the mountain that begins your journey. Although the initial incline may be a bit rough, it should be no biggie if you're the adventurous type, right? Map for location to the botanical garden: http://www.co.honolulu.hi.us/parks/hbg/kcbg.htm Koko Crater rim is in my top three picks on the island and I'd say is geared for the intermediate hiker because despite it's length (about two miles), there are many steep and dangerous areas to consider. If walking high along narrow ridges don't bother you, then I would highly recommend this trail! The way I describe the rim: breath taking, exhilarating and sometimes scary. It's also one where you need to be mindful of what's in front of you at all times, as the terrain here can get tricky. http://www.youtube.com/watch?v=iQD2IGpYW_Y Jaw dropping and spectacular are the views here! As you walk along the ridge line, you will see a great panorama of Kalama Valley, Sandy Beach, all the way to the blowhole and Hanauma Bay. A few yards in is where it starts to incline. The 3/4-point starts when you're climbing up rocks and not only does the trail gets narrower but also windier. I suggest you follow the paths to the left (marked by pink ribbons) that go around the rock formations, as they provide a safer alternative than walking the ledges above it. http://www.youtube.com/watch?v=EeJsCmT4H7k http://www.youtube.com/watch?v=QHYaOSgcd4Y Like I mentioned earlier about bullets whizzing past me on this hike, it's true because down below is a shooting range. The first one was so close, I could've sworn it broke the air behind my neck. Funny part is, usually I'm a bit nervous hiking here, as I'll admit I'm afraid of heights. Today, I was more worried about getting taken out by a stray bullet LOL! Also didn't help that the sound of ricocheting rounds were echoing in the distance. Listen, as you can hear the gun range in the background: http://www.youtube.com/watch?v=5PpBcutjS7Q The top is where the rim meets the railway hike, which is still my least favorite hike...EVER! I suggest you take the rim way because it's a lot nicer and way friendlier on you legs and cardio. Also things to consider when hiking the rim is that I recommend you wear long pants, I say that because there are a lot of dry shrubs and branches along the way (at the beginning, a lot of cactus) that will scrape and scratch up your legs. Trust me when I say I'm suffering from gashes on my shins right now. That and again, although miles away, you're still in the scope of a shooting range. "Probably" the reason for the warning signs. 5 stars Koko Crater Rim Trail in Koko Head


I've recently been hiking quite a bit, and this past weekend was my first time doing the Koko Crater Rim Trail. PROS: + Great views from start to end + Challenging + More than an just uphill walk + It's not awfully long + Several different CONS: - Not a lot of shade - Biting ants - You will probably have to go down the railway When my friend first brought up the idea of going on this hike I was intrigued. I read everyone's Yelp reviews, and looked up peoples youtube videos on it, and started looking forward to it more and more. This was my first experience hiking a crater rim! I guess it's a lot like a ridge hike, but narrower, and steeper. Excitement!! We started by meeting up at Koko Head Regional Park, where you would park to do the railway hike. And all jumped into one car to head over to the Blowhole parking lot. We parked there, and got started. We walked along the highway in the town direction and darted across when we got to the end of one of the guardrails which serves as the trail head if you're going to start with the arch. We followed the rough almost path up to the base of the arch, and stood there staring at what was ahead of us. Didn't look too tough from here: http://www.yelp.com/biz_photos/EhDZSmXRzGD0EjlZ4UZsYQ?select=2KxkiXoYxY_0CWnzW-d7wQ#dJbwr4V-4zSa3he9LZjdew It's a long way up: http://www.yelp.com/biz_photos/EhDZSmXRzGD0EjlZ4UZsYQ?select=2KxkiXoYxY_0CWnzW-d7wQ#2KxkiXoYxY_0CWnzW-d7wQ Luckily one of us had gone up this was just the week before, so she served as our guide on this expedition. This arch part of the hike was definitely the toughest part due to the fact that some parts are so steep you have to use all four of your limbs to literally climb your way up! Lean back a little too much, and you feel like you're going to fall off the rock. Once we managed to climb up the side of the crater we were on the rim. From here we followed the rim all the way to the old army bunkers that are at the top of the railway tracks. From here we headed down the rails (my least favorite part of the hike) back to the parking lot where we originally met up. The way down: http://www.yelp.com/biz_photos/EhDZSmXRzGD0EjlZ4UZsYQ?select=S4N53kxAfSWge-G6wN1F3A#S4N53kxAfSWge-G6wN1F3A There's practically no shade on this hike, so the sun will be beating down on you the whole time unless it's an overcast day, so make sure you slather on the sunscreen, and bring a lot of water. There was almost no wind on the day we went up there, so there were a bunch of flying ants all over the rim, and top of the railway. Those little suckers bit pretty hard too! Watch out for them if the wind isn't blowing. Also, I don't really recommend this hike for kids. It'll probably be pretty tough/scary for them. All in all, I would totally go on this hike again, and maybe see if there's a way to get down without going down the railway since that was my least favorite part of the trail.


***This is NOT a review of the Koko Head Stairs*** That's a different hike and in my not so humble opinion, a far inferior one. The "Stairs" hike is basically a grueling stair-master experience and mostly for the purpose of cardio fitness. It doesn't compare to the diversity, views and exhilaration of this Crater Rim hike. I only have a small window of time for hikes during the year and so I want to max out as much scenery and adrenaline as possible. That's why although there's never getting around the cardio aspect of a lot of hikes (which I value as well - I need to lose planny lbs.), I want them coupled with narrow ridges at times, maybe a little rock climbing, and definitely the views. As @EricA details nicely, this is from the INSIDE up from the Botanical Garden, the entrance for which is opposite of the Queen's Gate residential area of Hawaii Kai (just mauka of Sandy's). @EricA sums up nicely what this hike is all about. It has a nice cardio scramble for the first 20 minutes (much less than the 30-40 minutes of hell going up the Stairs). It then has a gradual ridge hike going counter clockwise up to the top (that's where the top of the Stairs is as well). Views of Sandy's, the Halona Blowhole, Hanauma Bay and Portlock are unparalleled. It also has some moderate rock climbing sections. It was overcast and drizzly this past Saturday but otherwise we would have had some views of Lanai, Molokai and possibly Maui on a clear day. And if we really got lucky, we could have seen some whales. But that would have all been house money as this is an amazing hike without those "extras". Because the trail was wet from the drizzle, going down would have been slippery and dangerous so we just went down the Stairs to get back to the bottom. That sucked because it's really hard on the knees (the stairs are yards apart and sometimes requires jumping down, trashing the knees). Finally, a walk back to the Botanical Garden parking lot from Koko Head park (where the trail head for the Stairs is) would have been like an hour walk back. Luckily someone in our group spotted a friend who had a pickup truck, so we piled in and he gave us a quick ride back. On hindsight, I would advise you leave one car at the park to shuttle back to the Botanical Garden parking lot (there's not a direct path, you have to go around via Lunalilo Home Road). There's one other way to get to the top of Koko Head Crater and that's via the rock bridge arch coming from the blowhole-Kalanianaole Highway side and I'd like to try it some day. I heard that the Hawaii Trail and Mountain Club does that each New Year's Day.


5/20/12 - Park one car at the botanical gardens, park another at the Koko Head Crater Hike (the long stairs one). Leave your slippers in the car at the Koko Head Crater Hike where you end. The botanical gardens that you enter from was very nice. Then we hit the cactus. It might be over grown, so be careful! I anticipated a painful hike, but was pleasantly surprised. Most of the way, it was nice and breezy. But because of the breeziness, I got sun burn. I couldn't even tell I was getting burnt - I even put sun screen on before I left!! Some of the top of the rim was creepy. Both sides you could fall to your death, and it was windy. But most of the way it felt safe - but that's just me. Going down KoKo Head tracks was the worst part! My legs were shaking and my knees were sore. There were a lot of people on Sunday afternoon, some running, some going very slowly. My legs are still hurting two days later. But you know what they say, the second day is the worst. I would go again.


I just did this trail for sunrise! It was spectacular! Short, little ridge you hike to this bautiful arch on the side of Koko crater. From there you continue up to the rim and you take left or right. Left is the West side of the rim which is the more harder with scrambles, then when you cross to the East side is a more graded hike. The crater rim is not for beginners for sure!


To find THE ARCH, you start by the blowhole parking and start across the street. Best visual of this is on "haiku626"'s YouTube page! Just follow that and it'll lead you to the obvious trail. Following you'll see the huge mountain on your right and the arch right ahead! This comes the trickiest part - going under and over the arch! Going under it we went to the right of it and it was a little scare and to go back up the opposite side. After the arch, keep following to get to the top and meet up with the koko head stairs. Went down the koko head stairs where my friend drove me back to my car at the blowhole. The scariest part is climbing over the arch. The hardest part is the part after the arch. Ha! But really, in all there are heart pounding moments for this steep, cardio intense hike! But in the end is all worth it and will be a fun challenge for intermediate hikers & risk takers, and probably a bit more intimidating for beginners. Have fun and be safe!


This review is of the less known route up to the top. It is a more exciting trail, and until you reach the crater rim, it is a lot easier climb. Once the rim trail is reached, you will face the same danger as the rim trail, hiking along a narror trail with fall off on each side. Hiking the rim is not for small kids or even older kids if they the type to horse around. Off the trail, the slope is very slippery. The trail head is located across the parking lot at the Blowhole. Cross the highway and head back toward Honolulu for about 25 yards. Scamble up the cliff face from the highway (an easy 25 ft climb), and once on top, head North-West toward the base, In a few minutes you should be able to see the rock-arch and the straight ridge line up to the top of the crater rim. The top of this trail reaches the rim near the shark point. 1 - Wear hiking or good cross-country shoes 2- long pants are better than shorts, because the brushes along the trail going up can be rough 3- Be extra careful going over the Arch, Its easier to go under the arch, especially when coming back down. 4- this trail and the rim trails are not for solo hikers 5- when you reach the rim, make a note where you are and your relatiionship to shark point on the rim, if you want to take this trail back down, especially if you parked in the Blowhole parking lot. It may be difficult to spot, since there is no unusal marking to where the Trail Head start for going back down.


This is the review for the Koko crater rim hike. Starting from botanical garden and goes up the west ridge. Then descend the east ridge and come back to the Botanical garden. I arrived pretty early around 7am at the botanical garden. The west side ridge is about 100 meter west to the parking lot and really easy to find. The trail is not walked much so it is a little overgrown. pants are recommended if you don't want your let get scratched. The ascending is gradual and not very physically intense. The more technical part start about half way. Quite a bit of ridge walking and not recommended for people afraid of height. I brought a pair of hiking poles and it helps to stabilize me on the ridge, especially when the wind is blowing. Took me about an hour to reach the top of the railway at moderate pace(not rushing, taking pictures every a few minutes). It gets harder when it get closer to the top so you can always turn back if you feel you're not ready for it. Going down the east side is quite less technical but there is still a couple of narrow part that is not for everyone. I met a group of people coming up from the arch and it looks quite fun. The worst part of the loop is then end of east side. After a steep descend the trail just disappears into the bushes. I'm not even sure I can find the trail head if I started on the east side. Anyway I got to the botanic garden and made it back to my car around 10am. It was a Sunday and I'm the only one I saw on the west ridge and I only saw 1 guy come down the east side after me. A lot less traffic than the popular rail way. The weather was breezy and overcast so I only drank 1 liter of water. The view was great in every direction so I took many photo stops. Good for experienced hiker and if you only have one car. Hiking poles recommended if you dislike crawling.


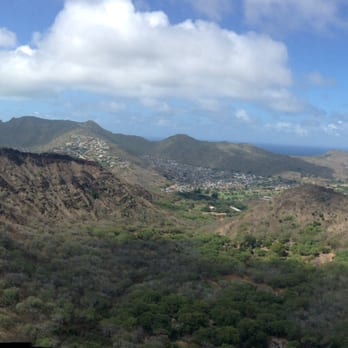
After reading the reviews it appears there are multiple ways to access the peak. A buddy and I started and finished from the botanical gardens parking lot. We went up counter clockwise and walked the length of the rim back down. Going up hill is no joke. You'll encounter troublesome obstacles that are not for the faint hearted or the clumsy hiker. Parts have straight drops on either side of you, with the trade winds hitting you the climb can be pretty intense. And watch out for the cacti! Once you reach the peak the hike becomes pretty easy as you walk the rim back down. Took us a little longer than three hours to walk the rim. We took a slower approach when reaching the top because it was raining off and on. I submitted a panorama of the length of the rim. It's in the photo section.


This is the second time that I've been hiking on Oahu and thought I was going to fall and perish to my death. Of course, there was a reason my friend and I were feeling that way, we weren't on a trail. We were scaling the cliff with nothing to hold onto but hope that we would make it to the top. So I'm going to tell you how to enjoy this fun, short hike up Koko Crater Rim the correct way. I know that there are a few ways to go up, we used Stuart Balls Hiking book to show us (kinda) how. 1. Park at the Halona blowhole parking lot 2. Cross the street and walk towards Hanauma Bay. The trail beginnings at the second guardrail on the right where there is a patch of grass and rocks to climb up onto. 3. Walk towards the natural arch. http://www.yelp.com/user_local_photos?select=TBkbapvgjcj-xApg5nYq8g&userid=QkQLnujuiBDP1mNChJYJww * Side note- This was the second time attempting this hike in two days. The first time we came to the arch - my friend was so sketched out by the steepness that we turned around and went home -Because of what happened the first time, we decided to go under the arch because we thought there was a trail....Well, we found out later on the trail that the correct way is to actually climb OVER the arc. Unfortunately we did not experience this so I cannot really give you any good advice but be careful and stay close to the ground especially if its windy. 4. Once you go over the arch you will see a trail that will lead you to the top of the ridge. Keep your eyes on the lookout for the triangular tuft of grass. http://www.yelp.com/user_local_photos?select=_lc_dYlAB_mgdoZSLAlEpw&userid=QkQLnujuiBDP1mNChJYJww After going under the arch, my friend and I went to the left and literally climbed up crumbling rocks scared for our lives till we were about 10 ft away from the tuft of grass and then we met Dan. A 50 something fearless year old man who hikes Koko Crater Rim on his days off. He was the one who informed us we had climbed up the wrong way and that going over the arch was "fun". He basically called anything dangerous fun. He ended up showing us the way to the top. There are two ways to hike the ridge. Going on the ridge or on the easier "chicken" path (as he called it) on the left. If you have climbed Olomana or even Ka'au Crater you'll be fine on the ridge. Although there are steep drops on the right side, the ridge isn't too narrow so as long as you take your time you'll be fine. http://www.yelp.com/user_local_photos?select=J-v5mtmePtwjQOWJgEhgSQ&userid=QkQLnujuiBDP1mNChJYJww 5. After following the ridge to the top of Koko Head Stairs and saying bye to Dan we ran down the stairs to check out a trail Dan had told us about. 6. After you get to the bottom of the stairs, walk towards the Koko Head shooting range and you'll see a trail in the woods on the left that will lead you down a hill and to the parking lot of the shooting range. If you see pink ribbons on the trees your on the right trail. 7. Now walk towards the road and cross the street. Walk along the road till you get to the next scenic point....Go over the guard rail and walk to the far right side of the parking lot. You'll see some cool rocks leading down to the ocean. http://www.yelp.com/user_local_photos?select=KJW7wNwvGDXEuInYVT0Ujg&userid=QkQLnujuiBDP1mNChJYJww If you are looking for a little change of scenery, there is a couple 7 ft. lava tunnels you can walk through. Be careful though cause it was high tide and you have to time it right or else you might be swept into the ocean. http://www.yelp.com/user_local_photos?select=7hG4DY3SqlbqhqFbgDIQbw&userid=QkQLnujuiBDP1mNChJYJww *We figured out after going through them that went through the lava tunnels the wrong way. You can walk along the road, passing the scenic point till you get to the bridge and then climb through the tunnels. The only thing is that I'm not positive if you can walk along the ocean back to the Blow Hole parking lot. 8. We walked along the road on the way back to the car. Although a little nerve-racking at times I enjoyed hiking something different and definitely recommend this hike to anyone looking for an intermediate level hike. YELP 365: 132/365


I had no idea what to expect here. A couple folks and I did the Koko Head stairs right before this, and the 2 of them were talking about wanting to go see the arch that was supposedly nearby. It was. I had no clue what they were talking about and just followed along. We parked by the blowhole area and then walked onto the highway and eventually walked across the highway and went up this area. No one else was there, just the 3 of us. Beautiful views of the water and rock formation. It suddenly got pretty steep, with no good traction. Some rocks looked sturdy to hold onto, but they then broke. Whoops. Not great. The 2 guys got up pretty quickly, and I was a few mins behind. The windy spots and breeze felt really good, though a bit scary since you're up there with nothing other than height to fall onto. The arch was really beautiful and it was worth this experience in my opinion. I was still shocked I made it up here. Down-wise though... i was using my arms a bit more and it took me a bit longer as I was crab walking most of the steep areas down. So thankful my shoes didn't slip on me for this short hike... otherwise it could have been nice knowing you all. read more



2 years ago
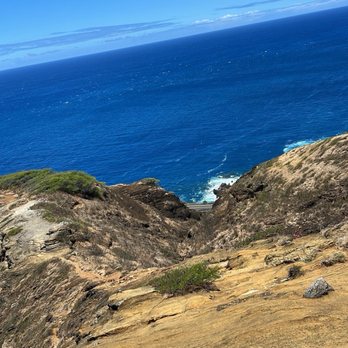
Short hike. But the end, very steep and scary to go down. Beautiful view. But I had enough for 1 time. read more


This route is great if you have some extra time. It's quite a bit longer than the railway trail, but it is definitely much more fun. Our tip is to bring two or more cars. Have one parked by Sandy's and the other parked at Koko Head State. You may choose whether you want to go up the rim and down the stairs or up the stairs and down the rim. You could go up and down the rim, but what fun is that? Scenery is pretty epic. There are definitely some more narrow/steeper parts. Branches stick out into the path as well so you need to watch out for you legs. If you go in the mid afternoon or early morning, you don't need to worry about the sun killing you. Time of completion? Depends on the route you take. If you start with the stairs it may take longer as you're more cautious going down the ridge. Possibly around 2.5-3 hours including the walk to your car. Starting with the ridge and ending with the stairs could run you around 2.5 hours including the walk from the car. Bring your friends and have a good time! Not recommended for pets though. They would probably make it through, but taking care of your dog while hiking up and/or down this ridge is a bit more than you could ask for. read more


6 years ago
One the most underrated hikes on the island that's more sure! Make sure you bring plenty of water and sunscreen as it is nearly non stop sunlight beaming on you the whole time, I would not recommend this hike with cloudy weather as you wont be able to see the gorgeous views of the ocean and mountain ranges of course! Also Koko head as you walk up looks great too. There is some bees on this trail and other bugs so be weary of that and try to avoid them to the best of your ability. read more




This is NOT the way with train track/stairs. That's the OTHER side. Today, not only did I almost fall off a mountain but also saw whales in the distance (at sea) and had two stray bullets fly over my head. Also, despite the vog keeping me at bay from taking clear photos, I'd say today was a great hike. In fact, superb! The Koko Crater rim trail is located inside the Koko Head Botanical Garden and stables behind the Hawaii Kai Golf Course. As you walk through the garden, stick to the trail on the left. It's about a 5-10 minute trek to the trail head. You'll know you're there when you reach the "Dry Palms" area. Look for the "Madagascar" section and the "DANGER: No access. Dangerous Conditions" sign shrouded under trees. There you will see the path up the mountain that begins your journey. Although the initial incline may be a bit rough, it should be no biggie if you're the adventurous type, right? Map for location to the botanical garden: http://www.co.honolulu.hi.us/parks/hbg/kcbg.htm Koko Crater rim is in my top three picks on the island and I'd say is geared for the intermediate hiker because despite it's length (about two miles), there are many steep and dangerous areas to consider. If walking high along narrow ridges don't bother you, then I would highly recommend this trail! The way I describe the rim: breath taking, exhilarating and sometimes scary. It's also one where you need to be mindful of what's in front of you at all times, as the terrain here can get tricky. http://www.youtube.com/watch?v=iQD2IGpYW_Y Jaw dropping and spectacular are the views here! As you walk along the ridge line, you will see a great panorama of Kalama Valley, Sandy Beach, all the way to the blowhole and Hanauma Bay. A few yards in is where it starts to incline. The 3/4-point starts when you're climbing up rocks and not only does the trail gets narrower but also windier. I suggest you follow the paths to the left (marked by pink ribbons) that go around the rock formations, as they provide a safer alternative than walking the ledges above it. http://www.youtube.com/watch?v=EeJsCmT4H7k http://www.youtube.com/watch?v=QHYaOSgcd4Y Like I mentioned earlier about bullets whizzing past me on this hike, it's true because down below is a shooting range. The first one was so close, I could've sworn it broke the air behind my neck. Funny part is, usually I'm a bit nervous hiking here, as I'll admit I'm afraid of heights. Today, I was more worried about getting taken out by a stray bullet LOL! Also didn't help that the sound of ricocheting rounds were echoing in the distance. Listen, as you can hear the gun range in the background: http://www.youtube.com/watch?v=5PpBcutjS7Q The top is where the rim meets the railway hike, which is still my least favorite hike...EVER! I suggest you take the rim way because it's a lot nicer and way friendlier on you legs and cardio. Also things to consider when hiking the rim is that I recommend you wear long pants, I say that because there are a lot of dry shrubs and branches along the way (at the beginning, a lot of cactus) that will scrape and scratch up your legs. Trust me when I say I'm suffering from gashes on my shins right now. That and again, although miles away, you're still in the scope of a shooting range. "Probably" the reason for the warning signs. 5 stars Koko Crater Rim Trail in Koko Head read more


I've recently been hiking quite a bit, and this past weekend was my first time doing the Koko Crater Rim Trail. PROS: + Great views from start to end + Challenging + More than an just uphill walk + It's not awfully long + Several different CONS: - Not a lot of shade - Biting ants - You will probably have to go down the railway When my friend first brought up the idea of going on this hike I was intrigued. I read everyone's Yelp reviews, and looked up peoples youtube videos on it, and started looking forward to it more and more. This was my first experience hiking a crater rim! I guess it's a lot like a ridge hike, but narrower, and steeper. Excitement!! We started by meeting up at Koko Head Regional Park, where you would park to do the railway hike. And all jumped into one car to head over to the Blowhole parking lot. We parked there, and got started. We walked along the highway in the town direction and darted across when we got to the end of one of the guardrails which serves as the trail head if you're going to start with the arch. We followed the rough almost path up to the base of the arch, and stood there staring at what was ahead of us. Didn't look too tough from here: http://www.yelp.com/biz_photos/EhDZSmXRzGD0EjlZ4UZsYQ?select=2KxkiXoYxY_0CWnzW-d7wQ#dJbwr4V-4zSa3he9LZjdew It's a long way up: http://www.yelp.com/biz_photos/EhDZSmXRzGD0EjlZ4UZsYQ?select=2KxkiXoYxY_0CWnzW-d7wQ#2KxkiXoYxY_0CWnzW-d7wQ Luckily one of us had gone up this was just the week before, so she served as our guide on this expedition. This arch part of the hike was definitely the toughest part due to the fact that some parts are so steep you have to use all four of your limbs to literally climb your way up! Lean back a little too much, and you feel like you're going to fall off the rock. Once we managed to climb up the side of the crater we were on the rim. From here we followed the rim all the way to the old army bunkers that are at the top of the railway tracks. From here we headed down the rails (my least favorite part of the hike) back to the parking lot where we originally met up. The way down: http://www.yelp.com/biz_photos/EhDZSmXRzGD0EjlZ4UZsYQ?select=S4N53kxAfSWge-G6wN1F3A#S4N53kxAfSWge-G6wN1F3A There's practically no shade on this hike, so the sun will be beating down on you the whole time unless it's an overcast day, so make sure you slather on the sunscreen, and bring a lot of water. There was almost no wind on the day we went up there, so there were a bunch of flying ants all over the rim, and top of the railway. Those little suckers bit pretty hard too! Watch out for them if the wind isn't blowing. Also, I don't really recommend this hike for kids. It'll probably be pretty tough/scary for them. All in all, I would totally go on this hike again, and maybe see if there's a way to get down without going down the railway since that was my least favorite part of the trail. read more


***This is NOT a review of the Koko Head Stairs*** That's a different hike and in my not so humble opinion, a far inferior one. The "Stairs" hike is basically a grueling stair-master experience and mostly for the purpose of cardio fitness. It doesn't compare to the diversity, views and exhilaration of this Crater Rim hike. I only have a small window of time for hikes during the year and so I want to max out as much scenery and adrenaline as possible. That's why although there's never getting around the cardio aspect of a lot of hikes (which I value as well - I need to lose planny lbs.), I want them coupled with narrow ridges at times, maybe a little rock climbing, and definitely the views. As @EricA details nicely, this is from the INSIDE up from the Botanical Garden, the entrance for which is opposite of the Queen's Gate residential area of Hawaii Kai (just mauka of Sandy's). @EricA sums up nicely what this hike is all about. It has a nice cardio scramble for the first 20 minutes (much less than the 30-40 minutes of hell going up the Stairs). It then has a gradual ridge hike going counter clockwise up to the top (that's where the top of the Stairs is as well). Views of Sandy's, the Halona Blowhole, Hanauma Bay and Portlock are unparalleled. It also has some moderate rock climbing sections. It was overcast and drizzly this past Saturday but otherwise we would have had some views of Lanai, Molokai and possibly Maui on a clear day. And if we really got lucky, we could have seen some whales. But that would have all been house money as this is an amazing hike without those "extras". Because the trail was wet from the drizzle, going down would have been slippery and dangerous so we just went down the Stairs to get back to the bottom. That sucked because it's really hard on the knees (the stairs are yards apart and sometimes requires jumping down, trashing the knees). Finally, a walk back to the Botanical Garden parking lot from Koko Head park (where the trail head for the Stairs is) would have been like an hour walk back. Luckily someone in our group spotted a friend who had a pickup truck, so we piled in and he gave us a quick ride back. On hindsight, I would advise you leave one car at the park to shuttle back to the Botanical Garden parking lot (there's not a direct path, you have to go around via Lunalilo Home Road). There's one other way to get to the top of Koko Head Crater and that's via the rock bridge arch coming from the blowhole-Kalanianaole Highway side and I'd like to try it some day. I heard that the Hawaii Trail and Mountain Club does that each New Year's Day. read more


14 years ago
5/20/12 - Park one car at the botanical gardens, park another at the Koko Head Crater Hike (the long stairs one). Leave your slippers in the car at the Koko Head Crater Hike where you end. The botanical gardens that you enter from was very nice. Then we hit the cactus. It might be over grown, so be careful! I anticipated a painful hike, but was pleasantly surprised. Most of the way, it was nice and breezy. But because of the breeziness, I got sun burn. I couldn't even tell I was getting burnt - I even put sun screen on before I left!! Some of the top of the rim was creepy. Both sides you could fall to your death, and it was windy. But most of the way it felt safe - but that's just me. Going down KoKo Head tracks was the worst part! My legs were shaking and my knees were sore. There were a lot of people on Sunday afternoon, some running, some going very slowly. My legs are still hurting two days later. But you know what they say, the second day is the worst. I would go again. read more


9 years ago
I just did this trail for sunrise! It was spectacular! Short, little ridge you hike to this bautiful arch on the side of Koko crater. From there you continue up to the rim and you take left or right. Left is the West side of the rim which is the more harder with scrambles, then when you cross to the East side is a more graded hike. The crater rim is not for beginners for sure! read more


12 years ago
To find THE ARCH, you start by the blowhole parking and start across the street. Best visual of this is on "haiku626"'s YouTube page! Just follow that and it'll lead you to the obvious trail. Following you'll see the huge mountain on your right and the arch right ahead! This comes the trickiest part - going under and over the arch! Going under it we went to the right of it and it was a little scare and to go back up the opposite side. After the arch, keep following to get to the top and meet up with the koko head stairs. Went down the koko head stairs where my friend drove me back to my car at the blowhole. The scariest part is climbing over the arch. The hardest part is the part after the arch. Ha! But really, in all there are heart pounding moments for this steep, cardio intense hike! But in the end is all worth it and will be a fun challenge for intermediate hikers & risk takers, and probably a bit more intimidating for beginners. Have fun and be safe! read more


15 years ago
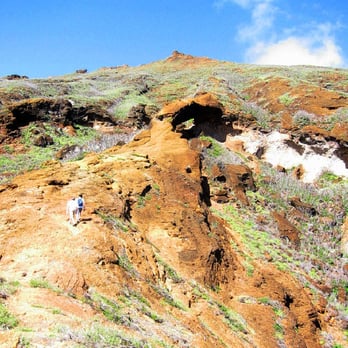
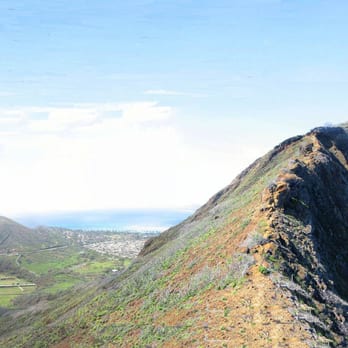
This review is of the less known route up to the top. It is a more exciting trail, and until you reach the crater rim, it is a lot easier climb. Once the rim trail is reached, you will face the same danger as the rim trail, hiking along a narror trail with fall off on each side. Hiking the rim is not for small kids or even older kids if they the type to horse around. Off the trail, the slope is very slippery. The trail head is located across the parking lot at the Blowhole. Cross the highway and head back toward Honolulu for about 25 yards. Scamble up the cliff face from the highway (an easy 25 ft climb), and once on top, head North-West toward the base, In a few minutes you should be able to see the rock-arch and the straight ridge line up to the top of the crater rim. The top of this trail reaches the rim near the shark point. 1 - Wear hiking or good cross-country shoes 2- long pants are better than shorts, because the brushes along the trail going up can be rough 3- Be extra careful going over the Arch, Its easier to go under the arch, especially when coming back down. 4- this trail and the rim trails are not for solo hikers 5- when you reach the rim, make a note where you are and your relatiionship to shark point on the rim, if you want to take this trail back down, especially if you parked in the Blowhole parking lot. It may be difficult to spot, since there is no unusal marking to where the Trail Head start for going back down. read more



8 years ago

11 years ago
This is the review for the Koko crater rim hike. Starting from botanical garden and goes up the west ridge. Then descend the east ridge and come back to the Botanical garden. I arrived pretty early around 7am at the botanical garden. The west side ridge is about 100 meter west to the parking lot and really easy to find. The trail is not walked much so it is a little overgrown. pants are recommended if you don't want your let get scratched. The ascending is gradual and not very physically intense. The more technical part start about half way. Quite a bit of ridge walking and not recommended for people afraid of height. I brought a pair of hiking poles and it helps to stabilize me on the ridge, especially when the wind is blowing. Took me about an hour to reach the top of the railway at moderate pace(not rushing, taking pictures every a few minutes). It gets harder when it get closer to the top so you can always turn back if you feel you're not ready for it. Going down the east side is quite less technical but there is still a couple of narrow part that is not for everyone. I met a group of people coming up from the arch and it looks quite fun. The worst part of the loop is then end of east side. After a steep descend the trail just disappears into the bushes. I'm not even sure I can find the trail head if I started on the east side. Anyway I got to the botanic garden and made it back to my car around 10am. It was a Sunday and I'm the only one I saw on the west ridge and I only saw 1 guy come down the east side after me. A lot less traffic than the popular rail way. The weather was breezy and overcast so I only drank 1 liter of water. The view was great in every direction so I took many photo stops. Good for experienced hiker and if you only have one car. Hiking poles recommended if you dislike crawling. read more


12 years ago
After reading the reviews it appears there are multiple ways to access the peak. A buddy and I started and finished from the botanical gardens parking lot. We went up counter clockwise and walked the length of the rim back down. Going up hill is no joke. You'll encounter troublesome obstacles that are not for the faint hearted or the clumsy hiker. Parts have straight drops on either side of you, with the trade winds hitting you the climb can be pretty intense. And watch out for the cacti! Once you reach the peak the hike becomes pretty easy as you walk the rim back down. Took us a little longer than three hours to walk the rim. We took a slower approach when reaching the top because it was raining off and on. I submitted a panorama of the length of the rim. It's in the photo section. read more


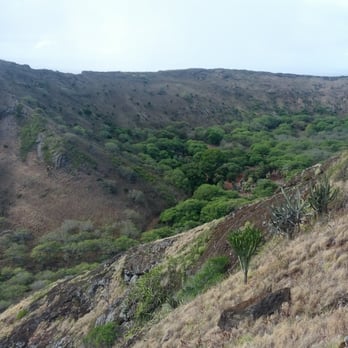


This is the second time that I've been hiking on Oahu and thought I was going to fall and perish to my death. Of course, there was a reason my friend and I were feeling that way, we weren't on a trail. We were scaling the cliff with nothing to hold onto but hope that we would make it to the top. So I'm going to tell you how to enjoy this fun, short hike up Koko Crater Rim the correct way. I know that there are a few ways to go up, we used Stuart Balls Hiking book to show us (kinda) how. 1. Park at the Halona blowhole parking lot 2. Cross the street and walk towards Hanauma Bay. The trail beginnings at the second guardrail on the right where there is a patch of grass and rocks to climb up onto. 3. Walk towards the natural arch. http://www.yelp.com/user_local_photos?select=TBkbapvgjcj-xApg5nYq8g&userid=QkQLnujuiBDP1mNChJYJww * Side note- This was the second time attempting this hike in two days. The first time we came to the arch - my friend was so sketched out by the steepness that we turned around and went home -Because of what happened the first time, we decided to go under the arch because we thought there was a trail....Well, we found out later on the trail that the correct way is to actually climb OVER the arc. Unfortunately we did not experience this so I cannot really give you any good advice but be careful and stay close to the ground especially if its windy. 4. Once you go over the arch you will see a trail that will lead you to the top of the ridge. Keep your eyes on the lookout for the triangular tuft of grass. http://www.yelp.com/user_local_photos?select=_lc_dYlAB_mgdoZSLAlEpw&userid=QkQLnujuiBDP1mNChJYJww After going under the arch, my friend and I went to the left and literally climbed up crumbling rocks scared for our lives till we were about 10 ft away from the tuft of grass and then we met Dan. A 50 something fearless year old man who hikes Koko Crater Rim on his days off. He was the one who informed us we had climbed up the wrong way and that going over the arch was "fun". He basically called anything dangerous fun. He ended up showing us the way to the top. There are two ways to hike the ridge. Going on the ridge or on the easier "chicken" path (as he called it) on the left. If you have climbed Olomana or even Ka'au Crater you'll be fine on the ridge. Although there are steep drops on the right side, the ridge isn't too narrow so as long as you take your time you'll be fine. http://www.yelp.com/user_local_photos?select=J-v5mtmePtwjQOWJgEhgSQ&userid=QkQLnujuiBDP1mNChJYJww 5. After following the ridge to the top of Koko Head Stairs and saying bye to Dan we ran down the stairs to check out a trail Dan had told us about. 6. After you get to the bottom of the stairs, walk towards the Koko Head shooting range and you'll see a trail in the woods on the left that will lead you down a hill and to the parking lot of the shooting range. If you see pink ribbons on the trees your on the right trail. 7. Now walk towards the road and cross the street. Walk along the road till you get to the next scenic point....Go over the guard rail and walk to the far right side of the parking lot. You'll see some cool rocks leading down to the ocean. http://www.yelp.com/user_local_photos?select=KJW7wNwvGDXEuInYVT0Ujg&userid=QkQLnujuiBDP1mNChJYJww If you are looking for a little change of scenery, there is a couple 7 ft. lava tunnels you can walk through. Be careful though cause it was high tide and you have to time it right or else you might be swept into the ocean. http://www.yelp.com/user_local_photos?select=7hG4DY3SqlbqhqFbgDIQbw&userid=QkQLnujuiBDP1mNChJYJww *We figured out after going through them that went through the lava tunnels the wrong way. You can walk along the road, passing the scenic point till you get to the bridge and then climb through the tunnels. The only thing is that I'm not positive if you can walk along the ocean back to the Blow Hole parking lot. 8. We walked along the road on the way back to the car. Although a little nerve-racking at times I enjoyed hiking something different and definitely recommend this hike to anyone looking for an intermediate level hike. YELP 365: 132/365 read more


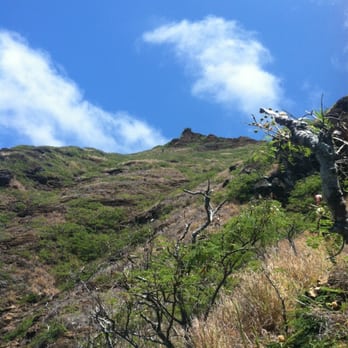


13 years ago

12 years ago
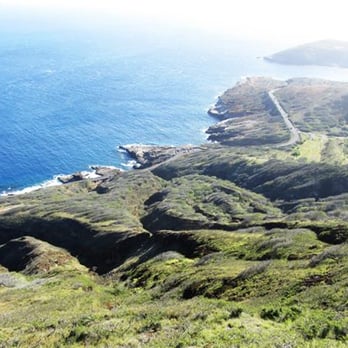
* This review, as titled, is for the Koko CRATER, RIM trail, not the Koko Head RAILWAY trail * I absolutely love this "trail", though I only ever do the makai (ocean side) half of the rim. Recommended for at least intermediate hikers, there are some slightly dangerous parts. Rating: Parking - Ample on both sides Hike - Intermediate on makai side, the other side is probably for more advanced hikers View - Absolutely gorgeous, and (minus the railway trail) there are few other hikers so it's very calming & you can go at your own pace Advice: * Sunscreen for sensitive skin peoples! * Be on alert for biting ants! Maybe bring some numbing/cortisol spray/cream for short-term but immediate relief treatment * Have someone park one car at Koko Head botanical garden and another at Koko Head railway trail parking lot (start on either side), otherwise it's like a 2-3mi walk back to the car OR having to backtrack to your starting point... * To chose your starting point: starting at Koko railway trail requires going up a very steep incline for about a mile on railroad tracks (so imagine a stairway with each step a few feet apart); or starting at the garden where it is a steep but short hike up, which can make the railway trail easier for people who prefer to hike down a steep descent * Good grippy or non-slip shoes & light clothing because it gets hot! * 1-3 liters of water * Depending on whether you plan on including the railway trail plan on at least 2.5hrs Detailed review: Though I am an intermediate/advanced (depending on the hike) hiker, my cardiovascular system isn't the best (I was a long-time smoker with asthma) so it can take me a good hour just to get to the top of the Koko Head rail trail, and will take about 45 minutes to do the rim; with stops for pics & just enjoying the view, the entire hike will generally take *ME* 3+ hours. The average hiker tends to take 20-40 minutes to the head of the railway, with advanced hikers taking as little as 10-15mins (totes jelly, yo). I consider an intermediate hiker someone who has done any of the following: the Tom-Tom trail, the first two peaks of Olomana, the entire Lanikai loop trail (past the Pillboxes all the way down the backside of Lanikai), Mariner's ridge (if you continue along Waimanalo ridge), Wa`ahila ridge, Kuliouou, Pali Puka or any other similar hikes with inclines/declines requiring the use of your hands. read more




15 years ago


12 years ago

12 years ago

12 years ago
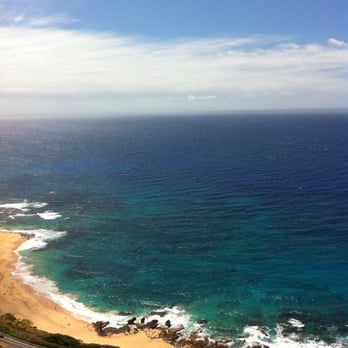
I remember the first time going up the thousands of stairs at Koko Head, hunched over with my hands on my knees and looking out at the ocean only to see people walking along the ridge. My first thoughts were, Are they crazy? Do they not know how narrow that ridge looks? I'm never doing that doing hike...This is my review of that ridge hike.... The climb to the top of the ridge was not particularly hard, however, there was a bunch of cactus. This caused us to walk very slowly and contort our bodies to avoid being poked by the cacti. Once you get to the top of the ridge it is quite a sight to behold. It is practically the same view as when you get to the top of Koko Head, but much closer...almost as if going from standard to HD haha. Great view of the ocean on one side of the ridge and Waimanalo and a view of the botanical gardens on the other. One of the first things that I noticed was that I was able to see both sides of the ridge at the same time. So it made for an interesting effect as the ground you're walking on remained still while each side of the ridge seemed to be moving. This also means that on either side of you is the edge of the cliff so yeah, I would not recommend this hike if it's raining because you are walking on a ridge! The ridge itself was not as narrow as I had first imagined. It's about the width of a normal sidewalk for the most part, however, there are a few places where it narrows considerably. The biggest issue is that you have to climb up or climb down some rocks and the wind is so strong it can be a little unsettling since, well, you know you could technically fall off and that wouldn't be so fun. There were a few parts where I tried to stay as low to the ground as possible so I wouldn't be affected by the wind so much. When you get to the top you end up at the same place when you reach the end of the Koko Head stairs, so that means walking down the stairs and then carpooling it back to the other side to get the car. There are apparently a few ways to get to the ridge as you can read in other reviews...for us we had left one car at the bottom of the Koko Head stairs and carpooled to the other side. I definitely would have gotten lost if I didn't go with someone who had already done this before...and I still might get lost the next time I go on this haha. I don't even want to attempt to go into how we got there, read the other reviews for directions...Couple of tidbits, the hike can be extremely hot as there are no shade, so I would recommend going early. It took us about two hours, but we stopped often to take pictures. There also must be a ladybug colony or something as there are hundreds of ladybugs up there, try not to step on them! In the end my imagination made this hike much more intimidating then it actually was. It was a fun little hike that is pretty chill with some great scenery, except for a few sketchy sections. If you're in the Hawaii Kai area and looking for an alternative to walking up those thousand stairs I recommend walking along the ridge. read more




15 years ago

11 years ago
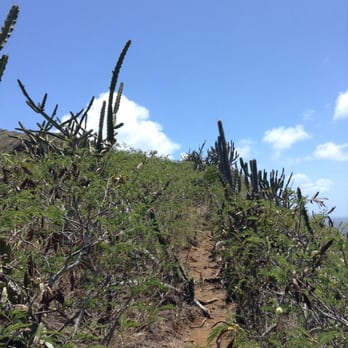
you park in the botanical garden, which is where the golf course is but all the way in the back in the crater. you follow the dirt trail in & follow the trail sign, though once you see a second trail sign there's another trail path on the right which you take. this starts you from the east side of the crater. then there's pretty much a dirt path to follow though on the way to the top you'll have some rocks to climb up. we went around 12p when we thought it would be really hot but the wind helped. but the downfall of that is that when rocking climbing & going through those narrow paths the wind can take you. some parts we had to climb on all fours to be safe. you reach the top which is the same top as if you were to do koko head stairs. going back down the west side of the crater was way more easier, though it just got windier so again be careful. then towards the end the path turns in to a dirty path down the inside of the crater. that was slippery & a dirty downhill, though we just used the trees to hold on to. then when you get back to the bottom you just follow the path back around through the botanical garden back to the parking area. overall I loved this hike. took us about 3 hrs but that's including stopping several times to take many pics as well as relaxing at the top. it's leisurely w/ a really nice view & in my opinion a way better hike than the stairs! just be careful though cause the branches sure stick out when walking on the path. I've gotten several scratches on my legs from them & let me tell you they're not flimsy branches that'll easily bend when you walk through them! also make sure you go on a nice day, not when it's rainy or too windy b/c of the steep, narrow, & rock climbing parts. I would def go again for the nice view & moderate workout. read more




15 years ago

12 years ago

16 years ago


15 years ago
More info about Koko Crater Arch Trail
350 Kealahou St
Honolulu, HI 96825
Directions
Hours
Outdoor Amenities
Koko Crater Arch Trail Reviews in Other Languages
Ask the Community - Koko Crater Arch Trail
Review Highlights - Koko Crater Arch Trail
You might also consider




















Why does Yelp recommend reviews?
2 reviews that are not currently recommended
The reviews below are not factored into the business's overall star rating.
15 years ago

17 years ago
Koko Crater Arch Trail - hiking - Updated September 2026
Best of Honolulu
People found Koko Crater Arch Trail by searching for…
Off Road Trails in Honolulu, HI
Scenic Night View in Honolulu, HI
Walking Groups in Honolulu, HI
Scenic Overlook in Honolulu, HI
Dog Friendly Hiking Trails in Honolulu, HI
Walking Trails in Honolulu, HI
Stroller Friendly Hikes in Honolulu, HI
Stairs Workout in Honolulu, HI
Public Gardens in Honolulu, HI
Trending Searches in Honolulu, HI
Apple Orchards near Koko Crater Arch Trail
Apple Picking near Koko Crater Arch Trail
Archery near Koko Crater Arch Trail
Beautiful Views near Koko Crater Arch Trail
Bike Shop near Koko Crater Arch Trail
Blow Dry Bar near Koko Crater Arch Trail
Casinos near Koko Crater Arch Trail
Cliff Jumping near Koko Crater Arch Trail
Consignment Shops near Koko Crater Arch Trail
Dog Friendly Things To Do near Koko Crater Arch Trail
Dog Swimming near Koko Crater Arch Trail
Eyebrow Threading near Koko Crater Arch Trail
Eyelash Extensions near Koko Crater Arch Trail
Kids Birthday Party near Koko Crater Arch Trail
Makeup Artists near Koko Crater Arch Trail
Nail Technicians near Koko Crater Arch Trail
Off Road Trails near Koko Crater Arch Trail
Parks near Koko Crater Arch Trail
Photo Spots near Koko Crater Arch Trail
Picnic Areas near Koko Crater Arch Trail
Places To Take Pictures near Koko Crater Arch Trail
Private Schools near Koko Crater Arch Trail
Public Shower near Koko Crater Arch Trail
Rock Quarry near Koko Crater Arch Trail
Running Trails near Koko Crater Arch Trail
Scenic Night View near Koko Crater Arch Trail
Scenic Overlook near Koko Crater Arch Trail
Teeth Whitening near Koko Crater Arch Trail
Browse Articles
Browse Nearby
BEST of Honolulu, Hawaii Coffee near Koko Crater Arch Trail
BEST of Honolulu, Hawaii Things to Do near Koko Crater Arch Trail
BEST of Honolulu, Hawaii Restaurants near Koko Crater Arch Trail
BEST of Honolulu, Hawaii Parks near Koko Crater Arch Trail
BEST of Honolulu, Hawaii Walking Trails near Koko Crater Arch Trail
BEST of Honolulu, Hawaii Breakfast near Koko Crater Arch Trail
Browse Brands
Related Searches in Honolulu, HI
Best Dog Hiking Trails Around Honolulu, Hawaii
Best Fishing Locations and Guides in Honolulu, Hawaii
Best Nature Trails for Hiking in Honolulu, Hawaii
Best Places for Horseback Riding in Honolulu, Hawaii
Best Sightseeing Experiences Available in Honolulu, Hawaii
Best Waterfalls and Swimming Holes in Honolulu, Hawaii
Discover Dog Friendly Trails to Explore in Honolulu, Hawaii
Discover Easy Hiking Trails Near Honolulu, Hawaii
Discover Kid Friendly Hiking Trails in Honolulu, Hawaii
Discover Popular Bike Trails in Honolulu, Hawaii
Discover Scenic Mountain Bike Trails Near Honolulu, Hawaii
Discover Top Nature Parks to Visit in Honolulu, Hawaii
Discover Walking Parks in Honolulu, Hawaii Near You
Discover a Hiking Trail in Honolulu, Hawaii
Discover the Best Night Hike Trails in Honolulu, Hawaii
Dog-Friendly Hikes With Dogs in Honolulu, Hawaii
Enjoy Camping Adventures Around Honolulu, Hawaii
Enjoy Kayaking Adventures in Honolulu, Hawaii
Enjoy Off Leash Dog Hikes in Honolulu, Hawaii
Enjoy Tent Camping Spots Around Honolulu, Hawaii
Enjoy a Beautiful Waterfall Hike in Honolulu, Hawaii
Enjoy the Best Walking Path in Honolulu, Hawaii
Enjoy the Best Walking Trails in Honolulu, Hawaii
Explore Easy Hikes Perfect for All in Honolulu, Hawaii
Explore Fun Activities to Do in Honolulu, Hawaii
Explore Popular Campgrounds Near Honolulu, Hawaii
Explore Popular State Park Destinations in Honolulu, Hawaii
Explore Top Dog Parks in Honolulu, Hawaii Near You
Explore the Best Beach Spots in Honolulu, Hawaii
Family Friendly Hiking With Kids in Honolulu, Hawaii
Find Cozy Camping Cabins in Honolulu, Hawaii
Find Popular Ziplining Spots Around Honolulu, Hawaii
Find Top Dog Friendly Parks to Visit in Honolulu, Hawaii
Find Top-Rated Waterfalls in Honolulu, Hawaii Now
Find the Best Parks for Picnics in Honolulu, Hawaii
Hiking Trails With Waterfalls in Honolulu, Hawaii
Off Leash Dog Hiking Trails in Honolulu, Hawaii
Picnic Areas With BBQ Pits Available in Honolulu, Hawaii
Popular Outdoor Activities to Try in Honolulu, Hawaii
Popular Picnic Spots to Visit in Honolulu, Hawaii
Popular Waterfall Hiking Trails in Honolulu, Hawaii
Safe and Fun Parks for Kids in Honolulu, Hawaii
Top Hiking Trails to Explore in Honolulu, Hawaii
Top Playgrounds for Kids to Enjoy in Honolulu, Hawaii
Top Running Trails to Explore in Honolulu, Hawaii
Top Swimming Spots and Pools in Honolulu, Hawaii
Top Things to Do With Kids in Honolulu, Hawaii
Top-Rated Camping Sites in Honolulu, Hawaii


