Request quote & availability
Response time
10 minutes
Covered by Yelp Guaranteed
Your project with this business is eligible for coverage up to $2,500 when you hire through 'Request quote & availability.' Terms apply. Learn more
Services - Epic Concrete Coatings
Epoxy coating
Floor refinishing
Epic Concrete Coatings Photos


More like Epic Concrete Coatings
Recommended Reviews - Epic Concrete Coatings
Start your review...
Reviews With Photos
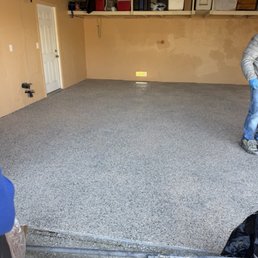


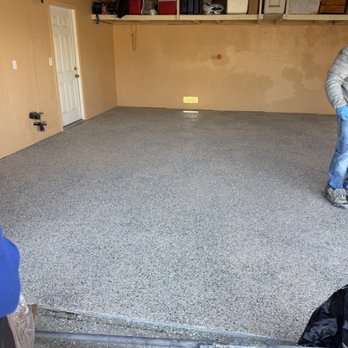
I hate to write negative reviews, but I really feel like we had a disappointing experience with Brian. His job wasn't horrible, not the best---but it was more about the customer service. Based on his reviews and his word, it seemed like we were matching with someone who was going to do a great job and work through with us if any situations did arise, especially since there was a very thorough review that gave 5 stars after many issues that happened with their garage. Unfortunately, our experience was not the same. Scheduling with Brian was easy and smooth. After Brian completed our garage and we were able to walk on to inspect it after 24 hrs of drying, we noticed that flakes were light, uneven, and patchy. At the front of the garage, there were a lot more flakes than the back of the garage. There were lumps of flakes that caused uneveness and little bumps. We contacted Brian to see if we could work something out for him to help us remediate the issues we saw. He initially stated that my husband stated he wanted less than 100% of the flakes on the floor, (which was not ever stated because why would we want less flakes for the price we are paying for). It was also never written on the invoice or any email that we wanted less than 100% of flakes. Ultimately, if that's what Brian believed, then we thought, ok...maybe it was a misunderstanding and miscommunication. He said that he should not have to fix a misunderstanding so he offered to redo the floors if WE PAID HIM $350 more. I stated that we would not be paying more for a job we weren't satisfied with. We've had epoxy done in our previous home so we know what a good job of epoxy looks like and we were saddened by the amount we paid for an unsatisfactory job. But the most disapointing thing in all this was that that Brian did not even want to open up conversation about it. No offers from him to come over and see what we were talking about. He was on the defensive the whole time saying he can't give us more of a discount because he already gave us a first responders discount of $50 and that he did a good job and he used top of the line products. We weren't asking for a discount, we were asking for a solution and, since he didn't give one to us without us having to pay, we asked to be compensated 10% for the result of the epoxy job that we weren't happy with so we could just move on. (BTW, 10% WAS LESS THAN THE $350 HE QUOTED US TO PAY HIM TO REDO THE THE GARAGE). He offered $100 back. Customer service is huge to us, especially because we try to support small businesses when we can and recommend them to others. We hate to say it but we would definitely not recommend Brian's company to others based on our experience. We hope others who decide to work with him get a better experience than we did.

Brian was very responsive when replying to texts and sent a formal invoice upon request. He started the job on time and finished it within the quoted time period. My garage floor come out amazing, better than I amagined. The flacks were spread out perfectly and the where applied thick enough where the floor has some traction. Great work.

Brian was awesome to work with. Very responsive and detailed oriented when applying my epoxy flake to my garage floor. No step was missed and he uses commercial grade product. Price was the best out there and the workmanship is great as well. He made sure I was happy with the finished product and it turned out great. Already had a couple neighbors compliment me. I Would definitely recommend Brian to family and friends and will use him on future projects. You won't be disappointed.


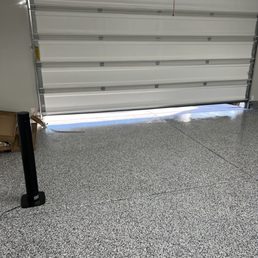
Brian put in a ton of extra time, effort, and his own expense to try to meet our expectations. Although I leave a 5 star review, I will also leave some critiques for both the company and others to consider when starting their epoxy project. Project Scope: 400 sq ft garage, metallic epoxy, original cost $3500, final cost $4100 (+$600 for polyaspartic top coat). Color: Don't choose black or dark colors, which show scratches and imperfections. Choose a marble-look, or try flakes. And pictures lie, don't trust your monitor, and ask for a sample. Beware the wind on exterior applications: The wind blew dirt, debris, and leaves into the wet epoxy/top coat during our project, requiring multiple attempts to address and mitigate environmental factors. The best solution was to cut cardboard from boxes to help cover the gap between the garage door and wet epoxy/top coat while it dried. Glossy vs. Matte/Satin Finishes: I would have preferred a matte finish to help mitigate the brightness of the sun when shining on the garage floor, which caused a bit of a blinding light (much like looking at water during sunset/sunrise). This is mostly a problem for west/east facing garages. I do wish I would have discussed this more before starting the project, and hope Brian will offer matte/satin finishes in the future. Although matte/satin finishes will make epoxy colors look more dull/washed out, I think it would help address glare as well as to hide imperfections. Polyaspartic top coats are really stinky. You'll want to air out your garage and house. # Visit 1: We originally chose a gray/silver and black color. After the first coat, I recall commenting that it looked a bit too black. I recall being re-assured that it would look lighter with another coat when the colors were mixed (e.g. silver would show more). I also noticed many imperfections in the first coat (bumps, rough spots, etc) and had expected a more smooth and even finish. Brian had mentioned that he had been noticing more imperfections lately in other projects and he thought it could be from poorer quality roller brushes from his supplier. # Visit 2: The next day Brian added a thicker coat to help smooth the bumps and ripples and to lighten the color. I also had concerns about slippage on epoxy, and asked Brian to add Shark Grip to the last coat, which I supplied. # Visit 3: Unfortunately, after the 2nd coat, there were still many imperfections along with unevenness in the Shark Grip application. At this point, we figured the wind was blowing debris into the garage during the drying process, which added to the imperfections. Brian tried to sand down some imperfections, and added yet a 3rd coat to help smooth out the finish. At this point, I came up with the idea to disassemble packaging boxes to help cover the gap between the garage door and wet epoxy to prevent debris from blowing in. # Visit 4: I pulled up the reference picture, and compared it to the end result, and I had to ask Brian about the color we chose. Apparently, the color we picked was "Pearl Black", and it was really more black in real life than the picture. He agreed to redo the project. Later, I noticed just how reflectively blinding the epoxy floor was in the afternoon sun, and kind of regretted starting the project. I asked Brian what could be done, and if we would put a satin or matte finish on the epoxy to prevent the glare. He later followed up and told me that the manufacturer suggested a polyaspartic top coat, but that would be an extra $600. I agree, if it helps to make it more matte and if it helps with the glare, to which he said it would. # Visit 5: Brian came back to redo the project, but at this point, I noticed some of the epoxy still seemed wet. Given conflicting schedules, he had to come back after his vacation. # Visit 6: Brian grinds down the "Pearl Black" epoxy finish, and applies a 3 part silver with 3 part black epoxy. He also brings some plastic tarps to cover the gap between the open garage and floor on the outside as the epoxy dries. Unfortunately, that afternoon, as the wind picked up, blowing the plastic into the wet epoxy, ruining the redo. # Visit 7: Brian sees that it can't be patched because of the marble-like look. Since we were interested in an even lighter color, Brian mixed a 2 part white, 2 part silver, 2 part black metallic epoxy and redid the floor. We liked this color. # Visit 8: Brian applies the polyaspartic top coat. # Visit 9: There are still a few missed spots and imperfections, and given it still looked pretty shiny, Brian comes back for a 2nd layer of top coat and orange peel finish. A few missed spots remain, and he says he'll come back. Overall, I like the look, but I think I still would have preferred a matte finish. This project took much longer and was more difficult than I think both of us had hoped, and I hope this review is helpful to newcomers to epoxy as well as to Brian for future projects.


Thank you Brian for the great job you did on my garage floor. Seeing the final results blew me away. It made a huge difference. My neighbors are stopping by with positive comments too. Well worth the price which was very competitive. Your availability and flexibility also helped since I was also having, plumbing, electrical's, and painting done as part of the same project. I highly recommend you and your company! Thank you, Xavier


Quick, efficient and reasonably priced. We made a last minute decision to get our garage floor epoxy coated. I requested multiple quotes via Yelp and Brian's quote was the most reasonable one. He was available to get the work done the very next day. Work was done to my expectation. Later I pointed out some unfinished spots on the edges; Brian come back to fix it. Overall great work.


I hired Brian for applying an epoxy coating in my garage (~450sqft). He was very responsive from getting a quote to finishing the job. His quote was accurate and he got the job done on time and in great quality. Overall, I had an awesome experience and would recommend Epic Concrete Coatings!


Brian did an awesome job on my garage floor!! He was a great communicator with lightning quick responses. I would highly recommend him for your epoxy floor projects!!


I reached out to Brian for our new home garage epoxy. From the initial conversation to the final job Brian was always very helpful and provided valuable feedback when decided between different colors. His job is very detailed oriented and he goes above and beyond to ensure you are happy with the final finish. I would highly recommend Brian for any Epoxy need. The color you see in the picture is Cabin fever.


Fit me in on short notice, very responsive to questions, provided clear expectations on how long the process would take, product looks fantastic, and quote was competitive.


I took on the project of having my garage epoxied. I didn't have a point of reference as to what a good price would be. I had a few quotes at 7K. I came across Brian's company and he gave me a significantly better and reasonable price. He was very responsive and even asked to do the job the next day after I had contacted him. It took me some time to get my garage in order in terms of moving everything out of there. I asked if he could come do the job a week earlier and he was more than willing to do so. We ran into some delays due to the heavy rain, but he was able to Fill and grind my garage floor and apply the epoxy and final quote. Very professional and kind.


4 months ago
Business owner information

Brian H.
Dear Ricky…

3 months ago
Brian of Epic Concrete Coatings is wonderful. Brian communicates clearly and quickly, provides fair quoting and listens to his customers to make sure he's delivering what the customer wants. I had a special request to lay down a primer, grey base, with nightfall flake and accent it with gold flake to make it stand out a little bit. I also wanted the floor to have texture (non-slip) but be smooth enough to work under my car. Brian laid down two top coats with sanding in between to achieve this. The garage floor came out exactly what I was looking for and neighbors have already commented on how good it looks. I would not hesitate to recommend Epic Concrete Coatings for future jobs, just be clear on what you want early on so Brian can quote properly. When I compared price, communication, and quality, Epic Concrete Coatings was the best. read more


4 months ago
Great company! Brian was very responsive with a competitive quote and very knowledgeable. He was on-time with all of his commitment and completed the job on schedule. I would definitely recommend this company. read more

Business owner information
Brian H.
Dear John…

2 months ago

3 months ago
4 months ago
Business owner information
Brian H.
Dear Tess ,…
8 months ago
They came when they said they would and fixed the floor and then added the finish. It was fine really fast and professionally! read more

2 years ago
I hate to write negative reviews, but I really feel like we had a disappointing experience with Brian. His job wasn't horrible, not the best---but it was more about the customer service. Based on his reviews and his word, it seemed like we were matching with someone who was going to do a great job and work through with us if any situations did arise, especially since there was a very thorough review that gave 5 stars after many issues that happened with their garage. Unfortunately, our experience was not the same. Scheduling with Brian was easy and smooth. After Brian completed our garage and we were able to walk on to inspect it after 24 hrs of drying, we noticed that flakes were light, uneven, and patchy. At the front of the garage, there were a lot more flakes than the back of the garage. There were lumps of flakes that caused uneveness and little bumps. We contacted Brian to see if we could work something out for him to help us remediate the issues we saw. He initially stated that my husband stated he wanted less than 100% of the flakes on the floor, (which was not ever stated because why would we want less flakes for the price we are paying for). It was also never written on the invoice or any email that we wanted less than 100% of flakes. Ultimately, if that's what Brian believed, then we thought, ok...maybe it was a misunderstanding and miscommunication. He said that he should not have to fix a misunderstanding so he offered to redo the floors if WE PAID HIM $350 more. I stated that we would not be paying more for a job we weren't satisfied with. We've had epoxy done in our previous home so we know what a good job of epoxy looks like and we were saddened by the amount we paid for an unsatisfactory job. But the most disapointing thing in all this was that that Brian did not even want to open up conversation about it. No offers from him to come over and see what we were talking about. He was on the defensive the whole time saying he can't give us more of a discount because he already gave us a first responders discount of $50 and that he did a good job and he used top of the line products. We weren't asking for a discount, we were asking for a solution and, since he didn't give one to us without us having to pay, we asked to be compensated 10% for the result of the epoxy job that we weren't happy with so we could just move on. (BTW, 10% WAS LESS THAN THE $350 HE QUOTED US TO PAY HIM TO REDO THE THE GARAGE). He offered $100 back. Customer service is huge to us, especially because we try to support small businesses when we can and recommend them to others. We hate to say it but we would definitely not recommend Brian's company to others based on our experience. We hope others who decide to work with him get a better experience than we did. read more


Business owner information
Brian H.
Dear Stephanie ,…
1 year ago
Brian was very responsive when replying to texts and sent a formal invoice upon request. He started the job on time and finished it within the quoted time period. My garage floor come out amazing, better than I amagined. The flacks were spread out perfectly and the where applied thick enough where the floor has some traction. Great work. read more

Business owner information
Brian H.
Dear Christian,…
8 months ago
Business owner information
Brian H.
Dear Michael,…

3 years ago
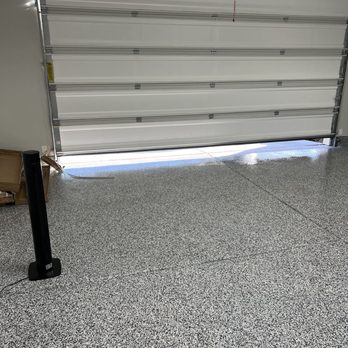
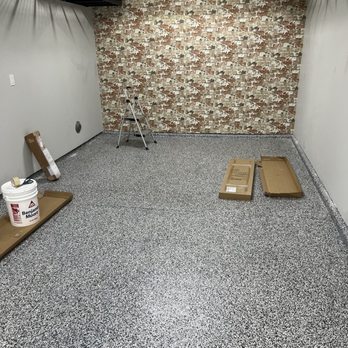
Brian was awesome to work with. Very responsive and detailed oriented when applying my epoxy flake to my garage floor. No step was missed and he uses commercial grade product. Price was the best out there and the workmanship is great as well. He made sure I was happy with the finished product and it turned out great. Already had a couple neighbors compliment me. I Would definitely recommend Brian to family and friends and will use him on future projects. You won't be disappointed. read more


4 years ago
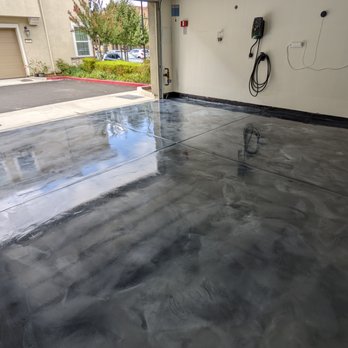
Brian put in a ton of extra time, effort, and his own expense to try to meet our expectations. Although I leave a 5 star review, I will also leave some critiques for both the company and others to consider when starting their epoxy project. Project Scope: 400 sq ft garage, metallic epoxy, original cost $3500, final cost $4100 (+$600 for polyaspartic top coat). Color: Don't choose black or dark colors, which show scratches and imperfections. Choose a marble-look, or try flakes. And pictures lie, don't trust your monitor, and ask for a sample. Beware the wind on exterior applications: The wind blew dirt, debris, and leaves into the wet epoxy/top coat during our project, requiring multiple attempts to address and mitigate environmental factors. The best solution was to cut cardboard from boxes to help cover the gap between the garage door and wet epoxy/top coat while it dried. Glossy vs. Matte/Satin Finishes: I would have preferred a matte finish to help mitigate the brightness of the sun when shining on the garage floor, which caused a bit of a blinding light (much like looking at water during sunset/sunrise). This is mostly a problem for west/east facing garages. I do wish I would have discussed this more before starting the project, and hope Brian will offer matte/satin finishes in the future. Although matte/satin finishes will make epoxy colors look more dull/washed out, I think it would help address glare as well as to hide imperfections. Polyaspartic top coats are really stinky. You'll want to air out your garage and house. # Visit 1: We originally chose a gray/silver and black color. After the first coat, I recall commenting that it looked a bit too black. I recall being re-assured that it would look lighter with another coat when the colors were mixed (e.g. silver would show more). I also noticed many imperfections in the first coat (bumps, rough spots, etc) and had expected a more smooth and even finish. Brian had mentioned that he had been noticing more imperfections lately in other projects and he thought it could be from poorer quality roller brushes from his supplier. # Visit 2: The next day Brian added a thicker coat to help smooth the bumps and ripples and to lighten the color. I also had concerns about slippage on epoxy, and asked Brian to add Shark Grip to the last coat, which I supplied. # Visit 3: Unfortunately, after the 2nd coat, there were still many imperfections along with unevenness in the Shark Grip application. At this point, we figured the wind was blowing debris into the garage during the drying process, which added to the imperfections. Brian tried to sand down some imperfections, and added yet a 3rd coat to help smooth out the finish. At this point, I came up with the idea to disassemble packaging boxes to help cover the gap between the garage door and wet epoxy to prevent debris from blowing in. # Visit 4: I pulled up the reference picture, and compared it to the end result, and I had to ask Brian about the color we chose. Apparently, the color we picked was "Pearl Black", and it was really more black in real life than the picture. He agreed to redo the project. Later, I noticed just how reflectively blinding the epoxy floor was in the afternoon sun, and kind of regretted starting the project. I asked Brian what could be done, and if we would put a satin or matte finish on the epoxy to prevent the glare. He later followed up and told me that the manufacturer suggested a polyaspartic top coat, but that would be an extra $600. I agree, if it helps to make it more matte and if it helps with the glare, to which he said it would. # Visit 5: Brian came back to redo the project, but at this point, I noticed some of the epoxy still seemed wet. Given conflicting schedules, he had to come back after his vacation. # Visit 6: Brian grinds down the "Pearl Black" epoxy finish, and applies a 3 part silver with 3 part black epoxy. He also brings some plastic tarps to cover the gap between the open garage and floor on the outside as the epoxy dries. Unfortunately, that afternoon, as the wind picked up, blowing the plastic into the wet epoxy, ruining the redo. # Visit 7: Brian sees that it can't be patched because of the marble-like look. Since we were interested in an even lighter color, Brian mixed a 2 part white, 2 part silver, 2 part black metallic epoxy and redid the floor. We liked this color. # Visit 8: Brian applies the polyaspartic top coat. # Visit 9: There are still a few missed spots and imperfections, and given it still looked pretty shiny, Brian comes back for a 2nd layer of top coat and orange peel finish. A few missed spots remain, and he says he'll come back. Overall, I like the look, but I think I still would have preferred a matte finish. This project took much longer and was more difficult than I think both of us had hoped, and I hope this review is helpful to newcomers to epoxy as well as to Brian for future projects. read more




3 years ago
Thank you Brian for the great job you did on my garage floor. Seeing the final results blew me away. It made a huge difference. My neighbors are stopping by with positive comments too. Well worth the price which was very competitive. Your availability and flexibility also helped since I was also having, plumbing, electrical's, and painting done as part of the same project. I highly recommend you and your company! Thank you, Xavier read more

Business owner information
Brian H.
Dear Xavier…

4 years ago
Quick, efficient and reasonably priced. We made a last minute decision to get our garage floor epoxy coated. I requested multiple quotes via Yelp and Brian's quote was the most reasonable one. He was available to get the work done the very next day. Work was done to my expectation. Later I pointed out some unfinished spots on the edges; Brian come back to fix it. Overall great work. read more

Business owner information
Brian H.
Dear Sarath,…

3 years ago
I hired Brian for applying an epoxy coating in my garage (~450sqft). He was very responsive from getting a quote to finishing the job. His quote was accurate and he got the job done on time and in great quality. Overall, I had an awesome experience and would recommend Epic Concrete Coatings! read more


2 years ago
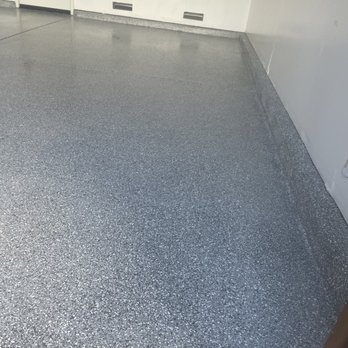
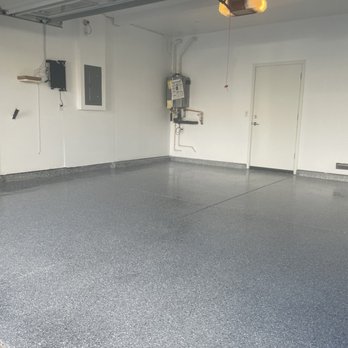
Great work!! We love our new garage floors. He worked fast and we have already sent some of our people to him that are looking to get their floors done as well. read more


Business owner information
Brian H.
Dear Maia ,…

3 years ago
Brian did an awesome job on my garage floor!! He was a great communicator with lightning quick responses. I would highly recommend him for your epoxy floor projects!! read more


Business owner information
Brian H.
Dear Ramzi,…

4 years ago
I reached out to Brian for our new home garage epoxy. From the initial conversation to the final job Brian was always very helpful and provided valuable feedback when decided between different colors. His job is very detailed oriented and he goes above and beyond to ensure you are happy with the final finish. I would highly recommend Brian for any Epoxy need. The color you see in the picture is Cabin fever. read more


4 years ago
Fit me in on short notice, very responsive to questions, provided clear expectations on how long the process would take, product looks fantastic, and quote was competitive. read more

Business owner information
Brian H.
Dear Cyrus…

4 years ago
I took on the project of having my garage epoxied. I didn't have a point of reference as to what a good price would be. I had a few quotes at 7K. I came across Brian's company and he gave me a significantly better and reasonable price. He was very responsive and even asked to do the job the next day after I had contacted him. It took me some time to get my garage in order in terms of moving everything out of there. I asked if he could come do the job a week earlier and he was more than willing to do so. We ran into some delays due to the heavy rain, but he was able to Fill and grind my garage floor and apply the epoxy and final quote. Very professional and kind. read more


Business owner information
Brian H.
Dear Is…

3 years ago
Business owner information
Brian H.
Dear Satish…
4 years ago
Brian from Epic Concrete Coating did an excellent job with Epoxy on my garage floor. The workmanship and attention to details really shows. He doesn't cut corners and makes certain that it is a job perfect done. My wife and I are so glad that we decided to have our garage floors Epoxied before we moved into our new house. Brian completely transformed our boring garage into a beautiful space. Pricing was also very reasonable. Brian is very responsive and reliable. I Highly recommended Epic Concrete Coating! The owner, Brian, is such a nice and caring guy. He came back a week later after he completed the job to check with me to make sure everything was to my satisfaction. I truly appreciate his customer service and follow up. read more


4 years ago
Brian is wonderful! We had him epoxy our patio and even though the job entailed numerous additional hours of cleaning and grinding than he initially anticipated, he was a great sport and very professional as he made sure to get the job done. Everything looks perfect, Brian even worked with me to find the perfect combination of colors for our area. Thank you so much! read more

Business owner information
Brian H.
Dear Molly ,…
4 years ago
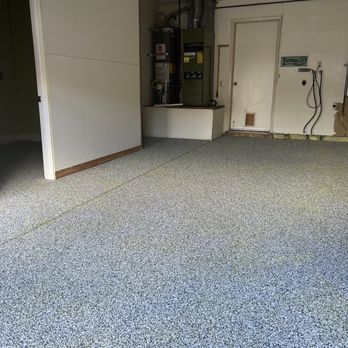
Brian did an awesome job in my garage. From very competitive quoting through finished product, he was always punctual, professional, and courteous. I didn't like my very own color choice and he fixed it. I noticed a few days later a missed patch of clear top coat and he came by the same day (through the snow) to take care of it. Brian makes sure the job is done when the customer is satisfied. My floor turned out fabulous! I couldn't be more pleased. Thank you, Brian! read more


Business owner information
Brian H.
Dear Silke ,…
3 years ago
Business owner information
Brian H.
Dear Ted ,…

4 years ago
When it comes to epoxy flooring make sure you hire someone knows how to do it. I've had a bad experience in the past hired someone on Yelp and did a bad job. My personal experienced with epic concrete was great the owner took his time to do his work. and kept his word. Easy to work with and did an excellent work as a business owner I highly recommend ( Brian the owner ) and his company. read more


Business owner information
Brian H.
Dear Denver ,…
4 years ago
We really like our new epoxy floor! Though, we had some issues with the first application not drying completely. Brian was very easy to reach and communicate with. He was able to fix the problem and we are happy with the results. read more

Business owner information
Brian H.
Dear Sukhbir…
4 years ago
Brian was absolutely great! Arrived at the right appointment time, did two days of magnificent work and the floor is sparkling with new tan epoxy flooring and clear coat. Great price and lifetime warranty is the icing on the cake. Loved his work! read more

Business owner information
Brian H.
Dear Akshay ,…
2 years ago
3 years ago
Brian at Epic Concrete Coatings did an awesome job with our garage/man cave epoxy floor. It looks like swirling ocean water and many of our friends and coworkers visiting have commented on how cool it is. Brian came back to do touch up and make it look great. Recommend 100%. read more

4 years ago
Definitely I gave the owner five stars. The epoxy flooring price is compatible, and he did a awesome work for my garage flooring project. Thank you Epic Concrete Coating! read more

Business owner information
Brian H.
Dear Vicky…
4 years ago
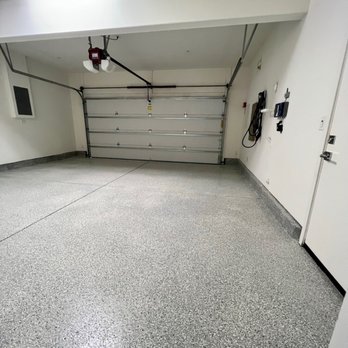
Before I do a project, I usually ask friends first if they know someone. This time, I went to Yelp for help. Brian from Epic Concrete Coatings was the first one who responded. With no drama, he gave me a quote right away. His price is very reasonable and the reviews are excellent so I hired him and I'm glad I did. Explained to me all the steps & kept me in the loop. He was very casual and friendly. Took all my anxieties away. But what the most important thing, did he do a good job? Yes. The result is everything I hoped for. We loved it. Now we hang out everyday in our garage. Amazing how a floor can transform your garage. If you're still undecided on who to hire for your epoxy floor, Epic Concrete Coatings is The One. Brian is just such a professional. He is the "guy your friend knows" without even knowing him. Thanks, Brian. Until the next project. read more




Business owner information
Brian H.
Dear Mel ,…
4 years ago
Brian was very responsive from the initial quote to coordinating a date for him to come coat my garage. He was able to rearrange his schedule to accommodate my other contractors and advised on color choices. Overall very pleased with the whole process. read more


4 years ago
Brian was very responsive to my questions and was quick to get to work, easy to work with, and did a great job on my garage floor. read more

Business owner information
Brian H.
Dear Stuart ,…
3 years ago
Business owner information
Brian H.
Dear Dariush…
4 years ago
4 years ago
Business owner information
Brian H.
Dear David ,…

4 years ago
Business owner information
Brian H.
Dear Fedor…
4 years ago
Business owner information
Brian H.
Dear Samuel…
4 years ago
Business owner information
Brian H.
Dear David ,…
More info about Epic Concrete Coatings
Ask the Community - Epic Concrete Coatings
Do you offer concrete grinding as part of a service? ie. floor prepping for coating
Of course